I decided to start a new post and have all the chop pics in one post. I left a bunch of the initial chop pics in my first post about the truck because they are linked into threads in some forums.
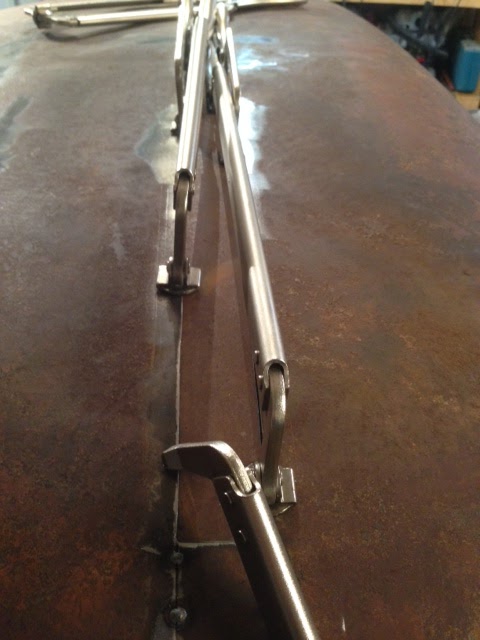
Bracing the cab for the chop.


Laying out the chop. After I took these pics, I changed the layout on the back. I forgot to take pics of the revised layout. These pics show the layout for a larger back window. I changed it to be a mailslot and removed the cut under the window that would have dropped the bottom of the window down a bit.


The start of the cutting.


Tacking the back back together.


Splitting the roof to stretch it.


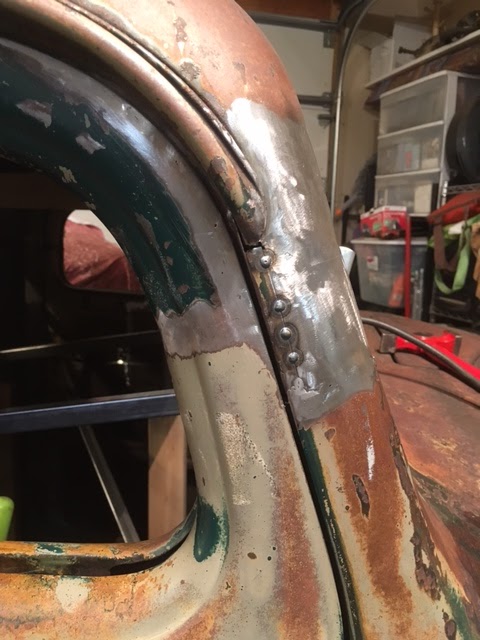
Found some lead in an A pillar. Dang!


Turns out there was lead in both A pillars and it was not from repaired damage. It was factory lead over a welded joint. The factory welds are ugly! I started filling them a bit and grinding them smooth. I found some rust under the lead as well.


I had to replace a section of drip rail on my roof top filler piece.


Then I installed the section.


I made a relief cut to get the roof to lie flat again.


I had a friend over this last weekend and he pointed out that I have a reverse rake the way things are sitting right now. I guess I have some extra work ahead of me to sort that out as it needs to change. It's subtle but it will change the attitude of the chop a lot.


I split the door top and tacked it to the door then clamped it.

I started cutting pieces out of the sections that i cut out of the door frames to use as filler in the door.


The other door top extension is done too.


The A-pillars are cut to length.


I re-split the roof to slide the front forward to match the re-cut a-pillars. I then started matching up the a-pillars.


Once the A-pillars were set, I needed to re-cut the door tops to modify the shape a little. I had them to straight in both the vertical and horizontal directions.


Second roof filler is in.


The door tops are welded. I still need to blend the edge flanges and grind.


I started on the A pillars...


I started grinding the doors so that I can blend the flange edges.


I blended the back edge of one door.

I got the front edge of the door blended.


I finally was able to get all the bracing out and get inside to finish up the rear window opening and get a feel for the inside!


No comments:
Post a Comment